
Thursday, 16 August 2012
Final:
Final: Datum

Final: Proportion

Final: Contrast

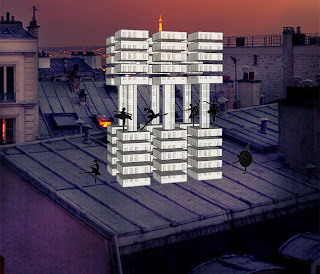
Final: Symmetry

Final: Repetition

Final: Figure/Ground

Tuesday, 14 August 2012
Week 5: Class 1
I have spoken to my teacher about all of my 3D images with entourage that i have been developing. She gave me some very constructive feedback on each of my designs. I need to change a few of the background scenes which are a little too pixelated and find some more suited ones. Most of them are minor changes like for me repetition image i would like to change the opacity slightly so my 3D image isn't so bold. I have one more 3D an entourage scene to develop with my figure/ground image and then i can upload all of my finals :)
Developing entourage: contrast

Developing entourage: symmetry

Developing entourage: proportion

Sunday, 12 August 2012
Developing entourage: Repetition
Developing entourage: Datum

Friday, 10 August 2012
First Entourage Attempt: Hierarchy

Week 4: Class 2
In class today we were given the project of taking our developed 3D images into photoshop and adding entourage. The next lot of posts i make will show my development through using photoshop in making my 3D images more interesting, adding movement, people and anything else exciting :) I will in the end have 7 final images to display each design principles. Please leave comments and tell me how I'm doing and whats working well!!
Thursday, 9 August 2012
Adding more detail: datum

Adding Texture: symmetry

Adding Texture: proportion

Adding Texture: hierarchy

Adding Texture: Repetition

Tuesday, 7 August 2012
Adding Texture: figure/ground

Figure/Ground - playing with different effects


YAY--- Shadow tool!!!
I FINALLY MANAGED TO USE THE SHADOW TOOL - i was only going through 'windows' to create the time and date not actually clicking 'view' then 'shadow'. must remember this!!!
Developing hierarchy more

Week 4: Class 1 - developing datum more

Independent Study : end of week 3
So the 7 images below is my independent study for the end of week 3. After working with my 7 design principles in google SketchUp and making them 3D we were then told to develop them into more interesting 3D images - i tried again to use the shadow tool but i was still unsuccessful even after talking to my teacher. I feel as though a lot of my 3D extended images would look better with shadow but i have compensated with changing the style, colour and and turning it translucent. Enjoy :)
Figure/Ground: extended ED

Datum: extended 3D

Hierarchy: extended 3D

Contrast: extended 3D

Proportion: extended 3D

Repetition: extended 3D

Symmetry - extended 3D

Subscribe to:
Comments (Atom)